Showing posts with label Art 455 B. Show all posts

Tuesday, April 26, 2016

Wet Plate Demo Thursday April 28

Lisa Dodge, California Ranches, Wet Plate Collodion Photographs

Wet Plate Collodion Artist Lisa Dodge will be giving an open demonstration of Wet Plate technique in the Photo Lab of Cal State Northridge on April 28, 2016 at 6:00PM. 


Lisa is an expert in the field of wet plate photography and is especially well known for her depictions of ranching culture and the American west. Subjects that typically do not hold still for wet plate collodion photographs. Lisa will be pouring plates and exposing them with the setting sun using a 19th century camera and then developing the plates in the CSUN Darkroom under the safelights so all can see the whole process. 

See more of Lisa’s work on her website: http://www.lisadodge.com

Lisa Dodge, Iron Horses, Wet Plate Collodion Photographs

Thursday, March 17, 2016

White Product Demo

March 17 lighting demo of a simple white background photo of a black and chrome subject with three lights. The trick is to get the image virtually shadowless with no retouching.

The largest softbox on a boom above and behind the subject. a strip box between camera position and the background in front of the subject. and a grid spot with snoot on a low stand to punch light into the front of the subject where needed. All photographed on old Polaroid45B with a Nikkor 120mm AM ED Macro lens on a Cambo 4x5.
Thanks for the help with setup and strike Jake and Ruben!

Friday, March 11, 2016

NEW STUDIO TECHNIQUE


A new technique for studio photos:

New technique F = No Softbox or Umbrella.

I’m adding a new technique to the list of 5. There are still two freebees, but I heard you when you said most of the techniques are outdoor and not for studio photos. So here’s a new studio-centric technique for you: Strobe lighting one of the assignments in the studio without using a softbox or umbrella anywhere in the photograph. You can bounce off V-flats or walls or fill cards or ceilings, just use 20” beauty dishes, 7” and 10” reflectors and grids or even bare tubes.

Here’s a recap of all the techniques:

A= Sun In / Daylight & Tungsten / Mixed lighting. Either the actual sun is in the frame, or there is a indoor/outdoor mix of tungsten light inside and daylight outside. Or mixed artificial lighting: When there is a continuous light source like street lights that you match or overpower by bringing in your own light to contrast the light you can’t control.

B= Overpower Daylight or Perfect fill flash. Either use a strobe outdoors in the day and overpower the ambient daylight with the high output of the strobe on your subject to make the ambient light underexposed. Or in a situation with low light on your model, use a strobe or speed light to add subtle  imperceptible fill light to expose the model perfectly. Show before and after fill light in the HERO blog post.

C= Dusk Dark. Photograph when the sunrise or sunset light matches the light from inside a building or streetlights or a drum circle, etc... This is about waiting for that perfect moment when the sky and interiors match. If the sky is black you waited too long.

D= Analog. Photograph using film or Polaroid or some other non-digital process.

E= Make It. Make the thing you are photographing. The subject, the model’s clothing, the set, the props, etc...

F= No Softbox in Studio. Strobe lighting one of the assignments in the studio without using a softbox or umbrella anywhere in the photograph. You can bounce off V-flats or walls or fill cards or ceilings, just use 20” beauty dishes, 7” and 10” reflectors, bare bulbs, aluminum foil, home-made lights or grids and snoots.

Freestyle 1. Two assignments can be done as you wish.
Freestyle 2. Two assignments can be done as you wish. 

Notes from LIGHTING lecture.

The three interconnected qualities of light:
Size, Direction and Distance.

Here are the drawings and notes from last night’s lighting lecture...
The photos should enbiggen if clicked.
Kelvin and CRI 
Basics about light modifiers for strobes and lights.
Softboxes, umbrellas, and grid spots. + Polarizers.


Saturday, February 20, 2016

BLOG POST FORMATING


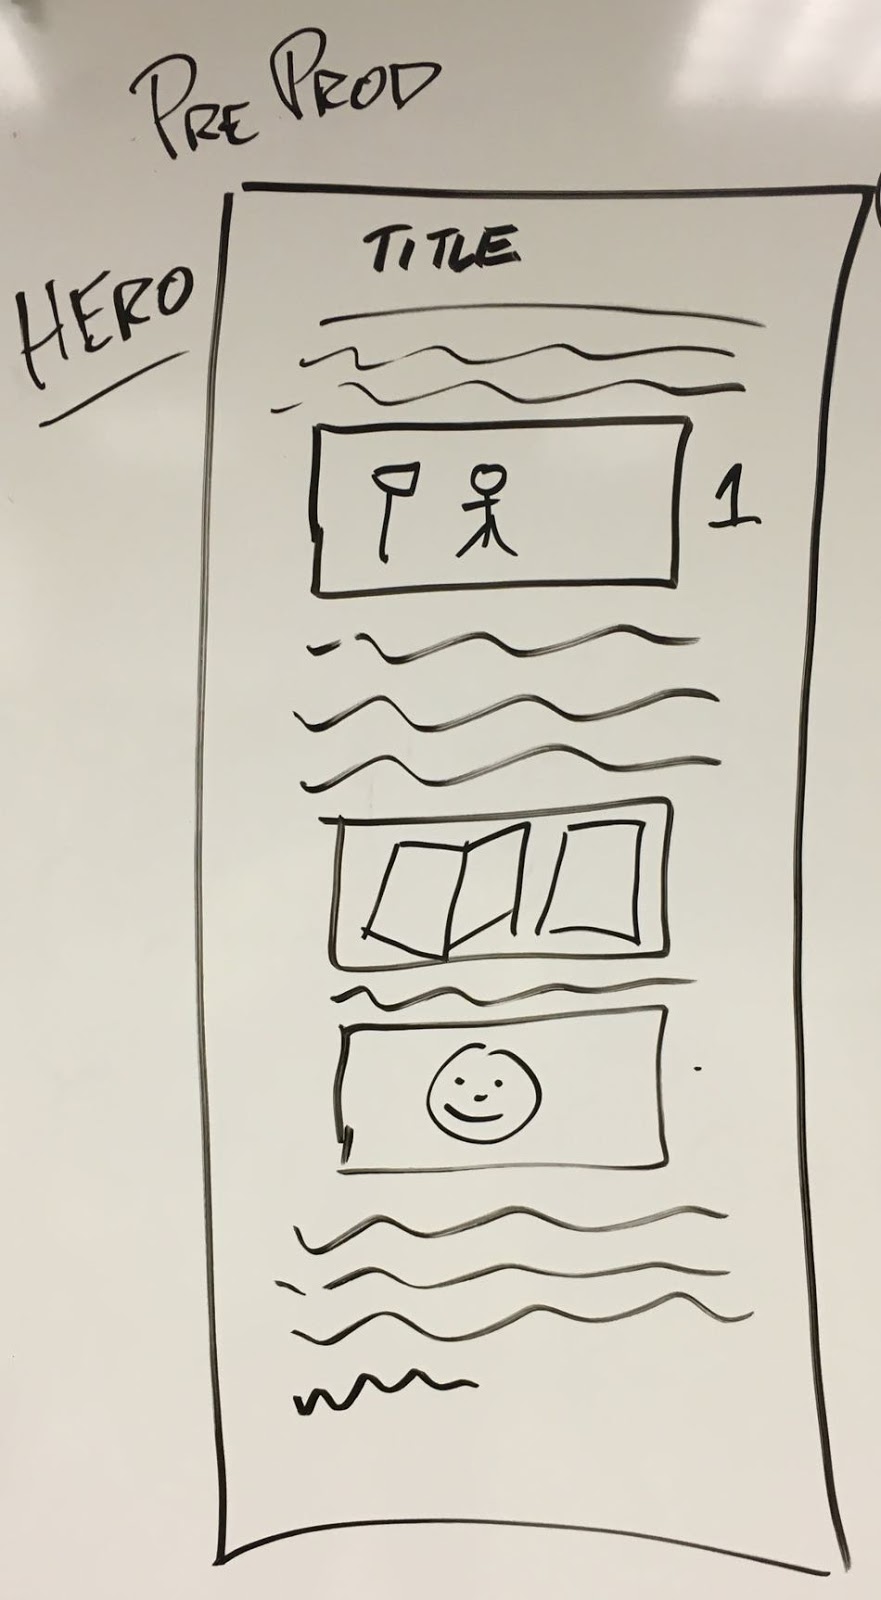
The basic template for blog posts.

Photo 455B/C assignments should be completed in the following blog format:


Ongoing photographic assignments will be given as “client briefs,” and require two parts, a “pre-project proposal” and a “Hero photo.” All assignments shall be submitted as blog posts on a public blog/website set up by you and shared with the instructor. Work will be graded from this online presentation. The blog will also be viewed and discussed in class as projected images.
  • Part 1: All projects require a “pre-project proposal” post. (3 images + 200-300 words.)
  • Part 2 “pre-project proposals” need to be approved by the client (professor) -send an email when your post is live for feedback from professor. 
  • Part 3: All projects require a “Hero photo” post. (Hero photo + Two supporting images and 200+ words.)
  • Part 4: “Pre-project proposal” and "Hero photo” posts will be graded as one completed assignment.
Make all images 2048 pixels on the long dimension.

Pre-project proposal.

The “pre-project proposal” should be formatted like a public online blog post. Text length about 200-300 words. It includes a written description of the photo concept and at least three (3) supporting images illustrating the concept (sketches, tear-sheets, scouting photos, etc.). The detailed written “pre-project proposal” is required before each final photograph is begun. The client (professor) will review each “pre-project proposal” online and offer comments and suggestions and approve or modify the idea just like a potential “Client” world.  Once your Pre-project proposal is uploaded, send me a link via E-mail. The client (professor) will give these comments and changes via e-mail and then the student should plan and create the final Hero photo from that new brief.


I’ll need about 24 hours to reply to your Pre-project proposal. 
If you need your feedback in a hurry because of impending weather or access to models, let me know in the subject line of your Email.


HERO blog post.

The “Hero photo" post must obviously include the final “HERO” photograph requested by the client (professor) at the top of the post, in the highest resolution viewable by your blog. In addition, supporting information should include text of about 200+ words describing the execution of the Hero view with lessons learned, problems solved, delays encountered, frustrations, epiphanies, your ideas, inspirations and a description of how you would improve the photo if you were to do it again. Include at least two (2) additional images like lighting sketches, rejected frames, variations, “first-frame” photos, pre-Photoshop images, lighting-setup images, etc.
Once your Hero is uploaded, send me a link via E-mail.


CSUN Art 455B/C | Advertising Photography | Spring 2016

Monday, January 25, 2016

Syllabus for Advertising Photography -ART 455 B/C

California State University Northridge
Art 455 B & C. Spring 2016. Advertising Photography II and III
Faculty: Stephen D. Schafer


Final Class Assignment and Grading Matrix